The five-week pottery course beginning in April focuses on folklore and mythology
The Green Man symbolises nature, rebirth, and spring – and Spring is nearly here. He is a, mysterious figure in British folklore, typically depicted as a face made of, or surrounded by, leaves. Made with stoneware clay, slab, sprigs, stamps and modelling. Finished with a chrome oxide wash
Mythological Creatures Pot
This project combines the functional with sculptural. You’ll convert a large pinch pot into a mythical figure. A mixture of pinch pots, slabs and modelling. White earthenware clay decorated with underglazes and crackle glaze
These are the three basic elements in our February Coil Pot project. The three need to work together to make a happy pot. Use these examples for inspiration.
FORM
A more upright form will show off your texture. Vases, urns and bottles are great but a straight-sided bowl can work too. The great thing about coiling is that things don’t have to be round. Maximum height is 20cm (but it can also be shorter).
Texture – Slip Trailing
This is a bit like using an icing bag to decorate a cake except you’ll use slip instead of icing.
Texture – Subtraction or Modelling
Other ways to add texture is by removing (or adding) clay with a tool or modelling with your fingers as you’re coiling.
Glaze
We’ll use my Stoneware glazes (the glaze used on my mugs) which break beautifully over texture. Layering the colours can give some groovy results and applying them over black slip gives a whole other dimension of groove. These examples show how glaze enhances the texture (although I may not have all of the same colours)
Gluggle Jugs, Moths and People Planters. Take a course to get through the last weeks of winter and get ready for Spring. Tuesday and Thursday evenings and Wednesday afternoons. All are welcome, from beginners to more experienced potters.
The Sgraffito line can make detailed drawings, striking silhouettes. or freehand scribbles.
The January course is decorating terracotta mugs, dipped in white slip. It can be left duo colour, (white and the reddish-brown of terracotta). Or, coloured underglaze can be applied with either a brush or a sponge.
Imagine a design or look online or in books for ideas. One thing to keep in mind….the surface is quite soft, and it’s not really possible to sketch out the design before-hand. So some degree of spontaneity is required.
Homework
I decorated my mug. Here’s a step by step guide for one way to do it.
Good luck and let me know if you have any questions.
The January course is making a low relief plaque inspired by the Swedish artist, Lisa Larson. It can be a house number or a wall decoration for inside or out.
How it’s done
The relief is built up with layers of stacked shapes cut from a clay slab.
The shapes are enhanced with interesting textures created with stamps, springs, incising, and slip trailing.
After the first firing, oxides are rubbed into the texture and some elements are glazed.
Inspiration
I put symbols about our household into my design. Tulips (my husband is Dutch) Growing out of a pot (that’s me) and we have a lovely pigeon couple living behind our house (named Mr and Mrs. Stubbs).
You can find ideas on the internet and on my Pinterest Page. When you’re learning, it’s okay to copy. Your version will always be your own.
Draw your design onto lightweight paper
The tile is 17x17cm and this is the size for your full-size drawing.(tracing, baking and printer paper are all okay.) If you’re using an irregular shape, keep it roughly this size. (It can be more narrow but only 3 cm taller).
Messy SketchFull size DrawingClay tile
Keep your shapes simple and not too small. You’ll be cutting them out of a slab of clay (like we did with the hen).
You’ve seen some of my stamp collection, but don’t need to know exactly which stamps or texture you’ll use. You’ll have time to play around and design as you make.
Gnomes and Mugs for £75 Take a short course in the run up to Christmas. You can make a gift for somebody or give one to yourself.
Christmas Gnomes £75
Tuesday Evenings, 6:30 – 9:30 25 November 2 December
This gnome is approximately 20cm tall and made with pinch pots, slabs, coils, and a garlic press (!). You can personalise him (or her) however you like. Make your gnome Christmassy or of the more traditional shovel-carrying sort.
Thursday Evenings 20 November 6:30 – 9:30 and 4 December 6:30- 7:30
27 November 6:30 – 9:30 and 4 December 6:30- 7:30
We’ll be making my ever-popular mugs. Made over two session, they are slab-built and decorated with stamps and glazes. It is a challenging project and great way to get to know clay. Plus, you’ll have a new favourite mug.
This is a very old decorating technique that the Scots did particularly well. There are potteries still using traditional motifs but it can also be used to create more modern or abstract patterns.
Find a design you like
Have a look on Google for some inspiration. Nicky Mosse and Emma Bridgewater both use more traditional designs. Ben Thomas designs are more contemporary and he layered stamps in an original way. If you’re short of time or intimidated by making a drawing, you might look to clipart on the web.
Generally pieces are decorated with more than one stamp. You can submit up to three images for three different stamps.
How to design your sponge
Draw out your design with black ink on white paper. We’ll be printing onto small dishes (oval: 20×10, round: 18×18). Make sure your motif will fit on the dish. For example, if you want it to repeat 5 times, the stamp will need to be small enough to fit 5 times. I would draw it at the actual size that I want it to be.
If this is getting a bit complicated and you don’t want to fuss with sizes, I will shrink or enlarge your design on the computer. It will be approximately 3 – 5cm
Photograph your design in good light without any shadows. Try to get a crisp, in focus photo. You can put all of your designs on one photo.
Email me the photo at “large” resolution. (this is how it looks on my mac) Let me know the approximate size of your stamps.
A note of Caution about fine lines
The thickness of your lines is important. A ball point pen line is too thin. A sharpie marker is thicker than necessary (and it makes the design quite chunky) but it’s okay if that’s what you’re looking for. Generally, someplace in-between is just right. Use a fine-tip felt marker if you have one.
Also, keep in mind that the sponge stamp squishes a bit when you’re printing. If your lines are too close together, they may squish into each other. So, leave an amount of white space between lines that is (at minimum) thicker than a ballpoint pen.
Try to make a clock that means something to you. It can be inspired by your pet, your garden, your football team, a holiday, or your sweet old Aunt Rose. You can find ideas on my Pinterest Site. Your clock will be constructed with a combination of some (or all) of the techniques you’ve already practiced in class: slab building, modelling, and pinch pots. Consider where you want it to go – hang on the wall, on the mantlepiece or gift-wrapped for a friend.
Design your clock
You’ll need a ruler, some heavy paper (or card), scissors, and a pencil.
Sketch the clock front
Maximum Size: 18x18x10cm It can’t be bigger, but it can be smaller 1. Draw an 18×18 square on your paper and design the clock front within those dimensions. 2. For your clock face, trace around the circle you drew in class. The point of the minute hand reaches the outer edge of the circle.
Make your pattern
Once you’re finished sketching the front, measure all of the dimensions and then draw your pattern pieces so they’ll match up.
Decorating
Here are some things to consider when you’re making your design
3-D Considerations
Your clock is basically a box. You’ll tack on any 3-D elements: sprigs, stamps, and modelled sculptural elements. All sides of the clock can be decorated (except the back). I’ve ordered some number stamps (approx 1.5cm high) if you’d like to use those for the hours. If there is something you want that I don’t have, you can make your own sprigs or stamps at home with some air dry clay or Fimo.
Painting Considerations
Your clock is made with white earthenware clay. You can add colour by painting it with coloured slips and underglazes.
Coloured Slips
You’ll use slips to change the base colour of your clock (if you don’t want it to be white) or anyplace else where you want a solid colour. Also use slip to fill in the stamps for mishima.
Underglazes
You’ll use these to add painterly details to your clock and for the numbers (if you haven’t used stamps). Underglazes are not opaque and won’t cover a dark background colour. (So paint the base slip colour a light colour.)
Next week you’ll be painting your fabulous shrines. It’s hard to estimate how long this will take. I want you to take your time and enjoy it. However, if you finish early, you can make a final project. All of these options are made from white earthenware and painted with coloured glazes. Here are your choices:
Spoon rest I found these on the internet and I think they’re charming. It’s a quick slab build and will be a good project if there isn’t much time left. I’ll have the patterns for these, but you can certainly come with your own idea and pattern. You know how to slab build so you can work on this independently. Maximum size is 10x15cm
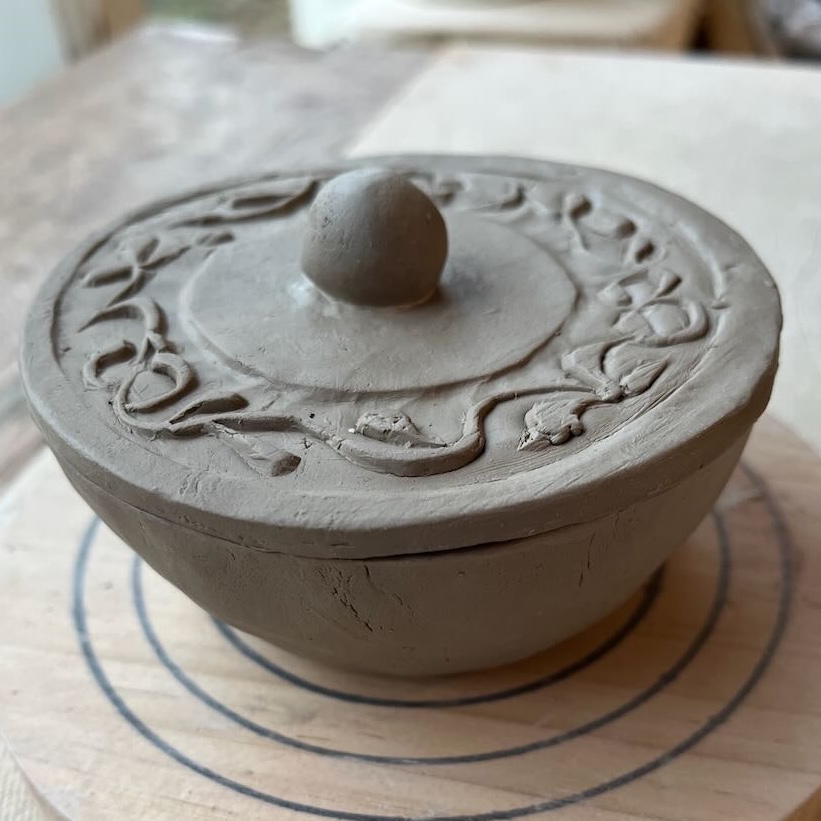
2. Pinch pots
You can make either a lidded pot or a little mug and decorate them with stamps or incising. (These examples are both unglazed) I will lead with this project because you haven’t made them before and pinch pots are more complicated than you might think. These also take longer to make and so will depend on how much class time is remaining.
3. Your own idea
If you have an idea for something, go ahead and make it! However, keep it on the small side and you do need to finish by the end of class